Technical Insights
Can I Use the RSH2 with an Oscilloscope?
 2 min
2 min
5 min



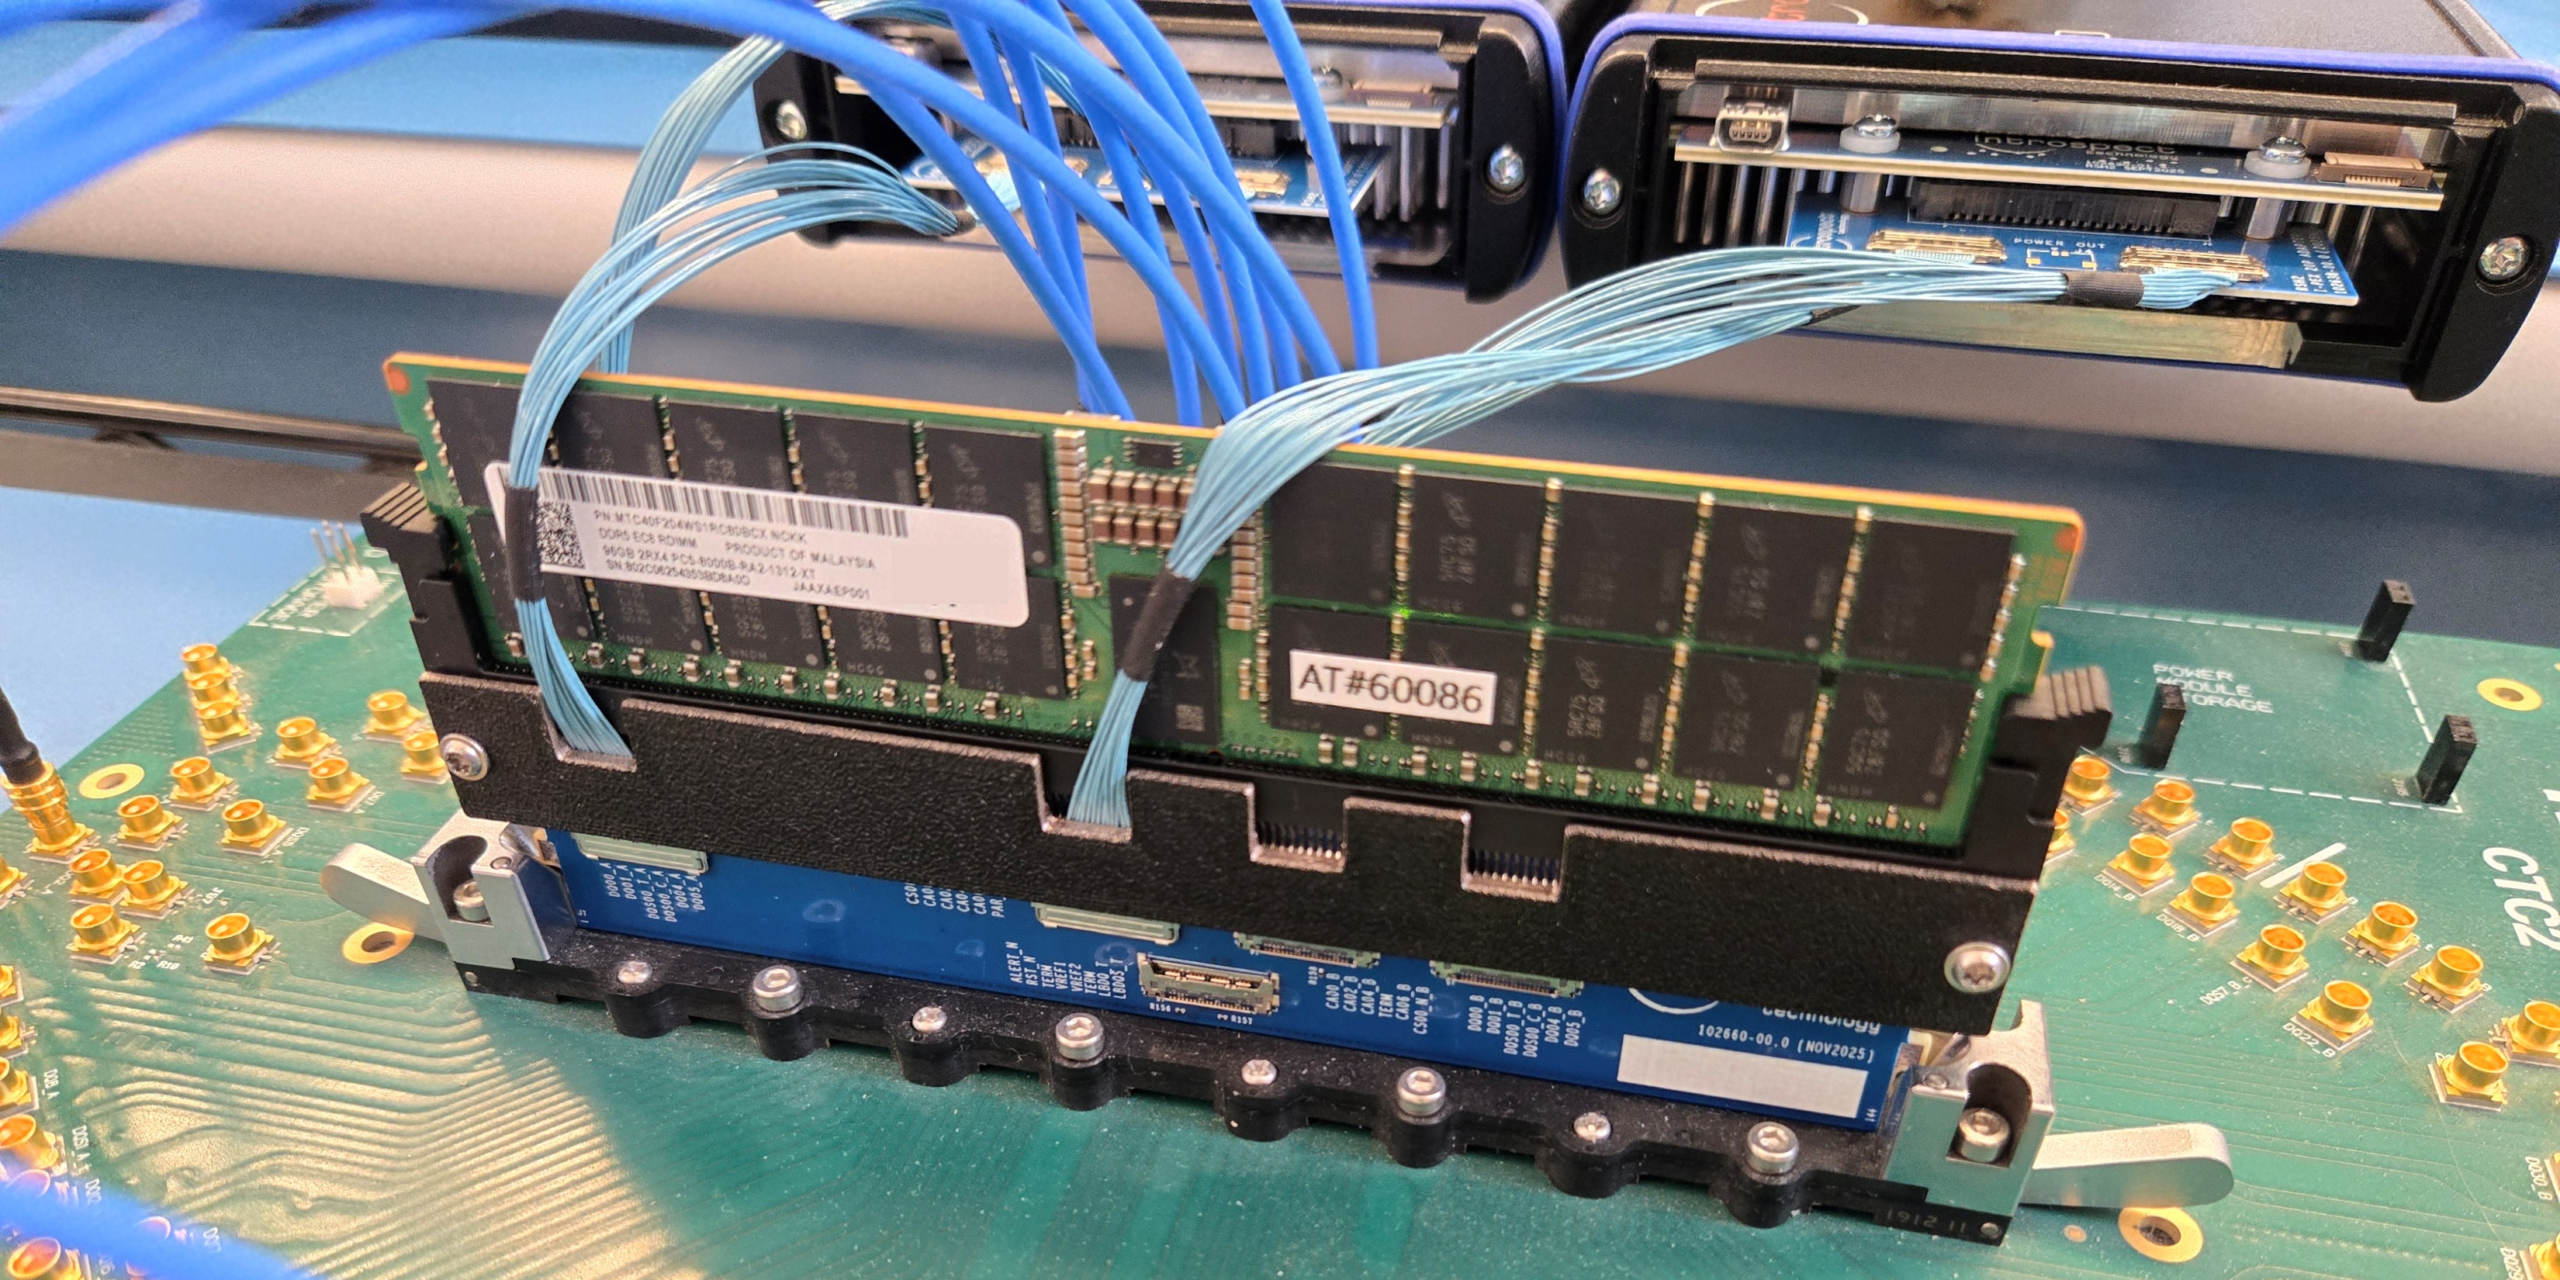

When debugging DDR memory modules, riser modules have traditionally been deployed to help connect a logic analyzer to a live system containing the memory modules. However, with every generation of DDR memory going faster than the one before, it has become more difficult to use risers, and this is due to the classical challenges of probing signals in the middle of a high-speed bus. This is so much the case, that even in the DDR5 generation of DIMMs and RDIMMs, there is a lot of apprehension about using risers.
But what if we told you that it is not only still possible to use risers with protocol analyzers, but that these risers can also be a truly indispensable tool for oscilloscope measurements and for rapidly verifying register settings? Read more to learn about the 7412 DDR5 RDIMM Riser from Introspect Technology and how it provides such easy access to signals on a DIMM under test!
The magic of the 7412 RDIMM Riser is that it has originally been designed as an oscilloscope probing solution. It relies on active probing and our integrated-tip technology, thus offering extremely low loading and low noise performance. Referring to Figure 1, the 7412 is designed to work directly with our Remote Sampling Head (RSH) product, and this means that all high-speed signals are tapped with a high impedance tip and a world-class probe amplifier.
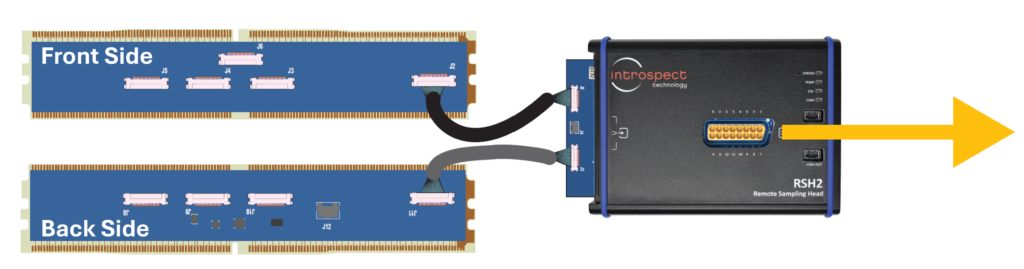
Figure 1: The RDIMM riser works with the Remote Sampling Head (RSH), thus enabling oscilloscope measurements.
Of course, when the riser and RSH are combined with the M7030 protocol analyzer, users can get a complete protocol picture. This is illustrated in Figure 2, where we show the command bus operating under a relatively high payload (stress) condition. You can see how frequently the commands are being transmitted by the memory controller, and how the M7030 analyzer is automatically tracking each command.
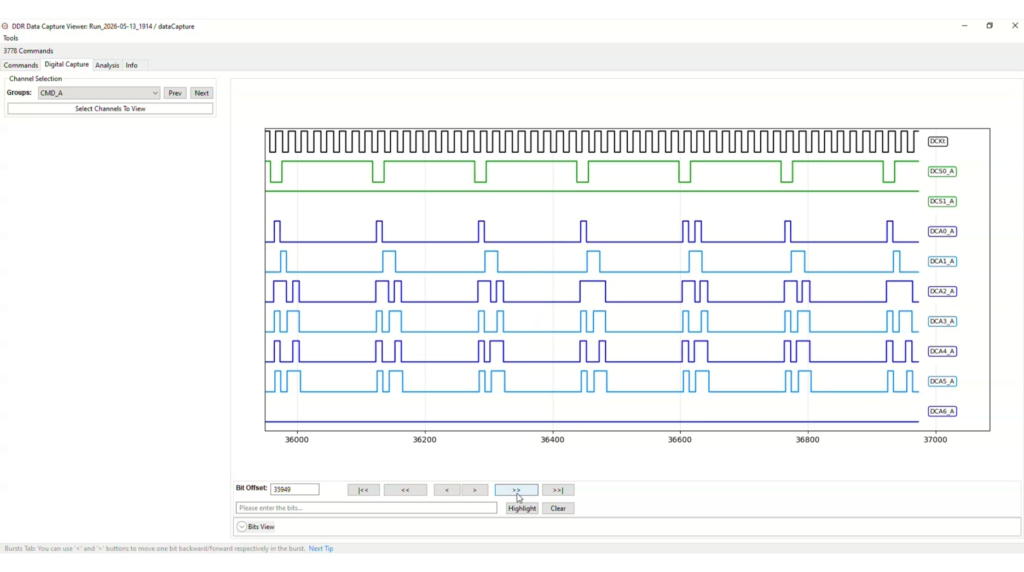
Figure 2: Protocol analyzer trace obtained through RDIMM riser.
A real hidden power of the 7412 RDIMM Riser is that it can prove indispensable for oscilloscope measurements and rapid register debugging. This is really the subject of the next case study. It is a case study of a controller developer that was trying to enable a multi-rank DDR5 RDIMM. With the 7412 RDIMM Riser connected to the scope, the developer was able to very quickly identify the root cause of interoperability issues. Furthermore, the developer was able to optimize the termination settings on the DRAM devices, thus ensuring that their design was well-tuned for real server applications.
In this case study, we were not able to get proper enumeration on some DRAM devices within a DDR5 RDIMM. Then, we connected the 7412 RDIMM Riser, and what we observed was truly fascinating. We were able to quickly understand the issue and fix it in almost no time.
We looked at a write-phase burst on one of the DQ lines of the DRAM we were targeting. The waveform was probed by using the 7412 RDIMM Riser, a RSH2, and a standard 50-Ohm high-speed vendor oscilloscope. We did not need to perform any kind of oscilloscope calibration nor did we need to use any proprietary oscilloscope software. The waveform we observed is shown in Figure 3.
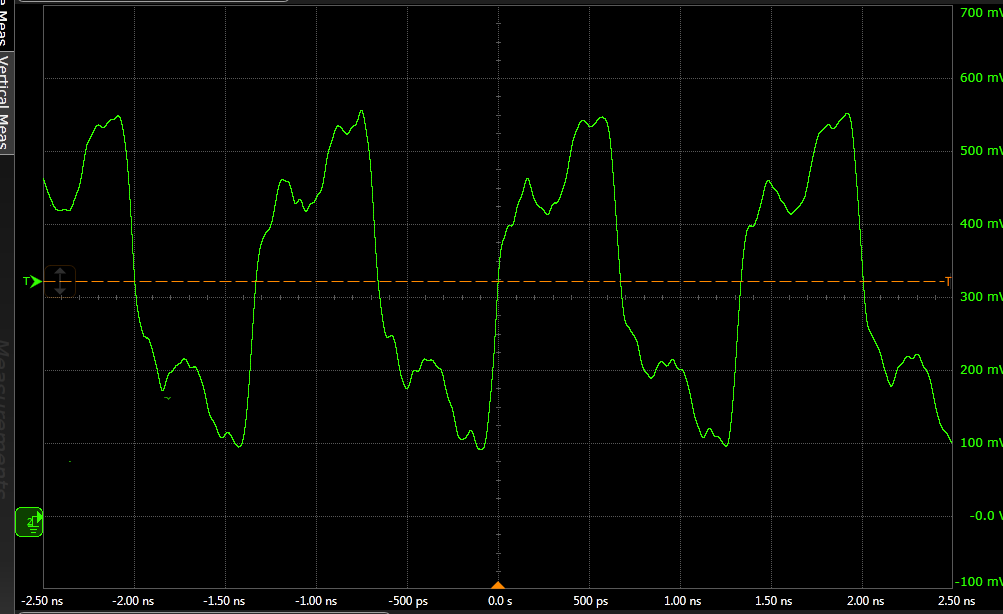
Figure 3: Forgot to initialize the second rank?
Very quickly, we realized that we were simply not initializing the second rank. Being a two-rank RDIMM, when the second rank is not initialized, we expect to observe huge reflections, and this is what the 7412 RDIMM Riser was able to show us.
After enabling the second rank, the waveform looked like that in Figure 4. Still, we observe a lot of reflections. We then focused on the register settings we applied for RttWr and RttPark – these are the programmable termination resistors on each DRAM device within a DDR5 RDIMM. We discovered that we had the wrong default values for these registers.
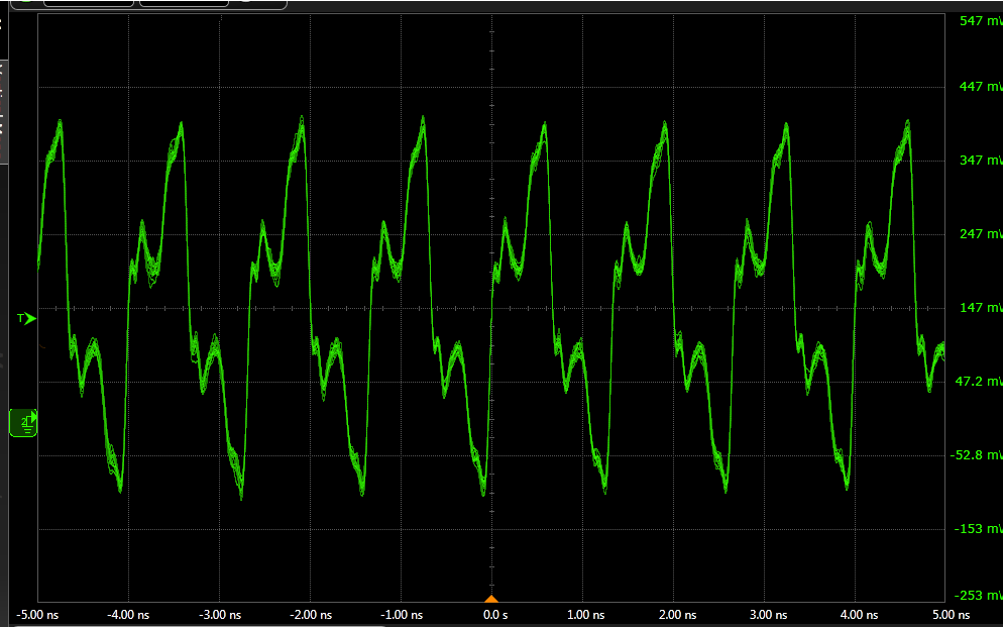
Figure 4: Rank 1 is initialized, but the RttWr and RttPark are all wrong.
From this point onward, it became apparent that we had a good understanding of why the system was not booting up properly. We then sequentially – and experimentally – iterated through multiple RttWr and RttPark register values in order to obtain the best settings for our system board. The following three figures show how we progressively improved the waveform until we eliminated any reflections from the DRAM side of the interface!
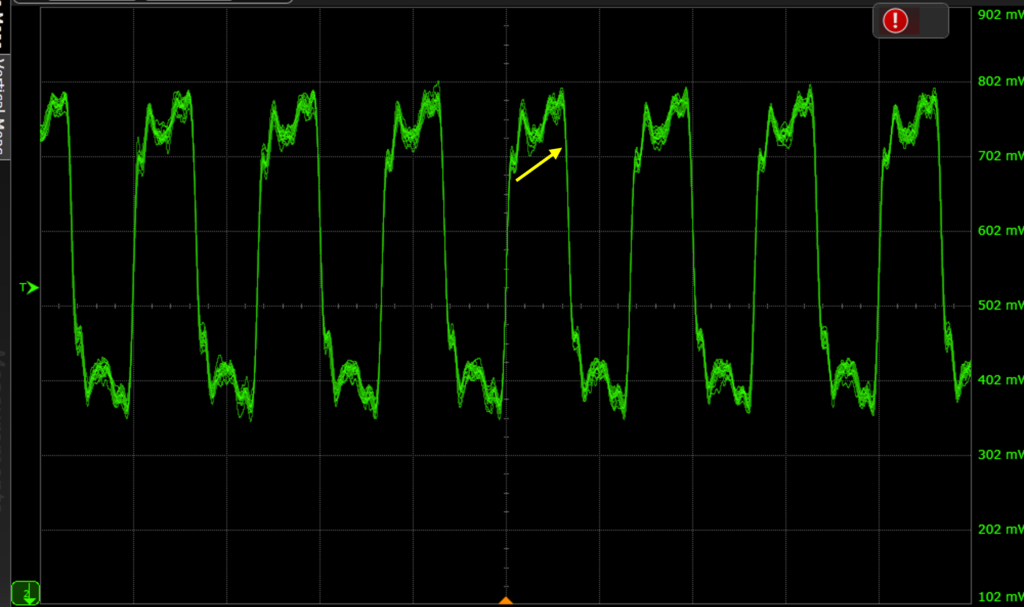
Figure 5: Better values for RttWr and RttPark.
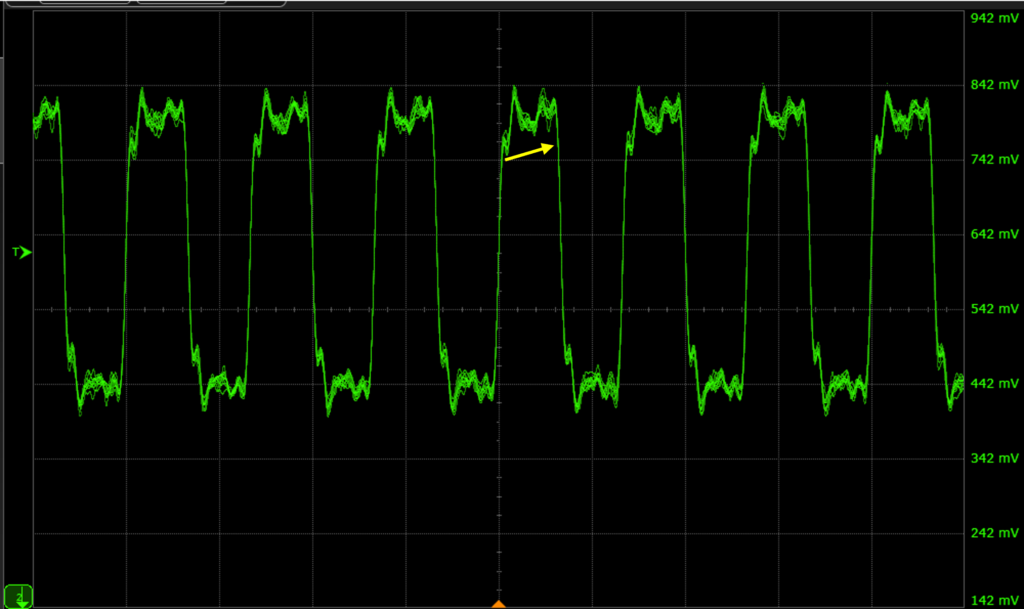
Figure 6: Even better values for RttWr and RttPark.
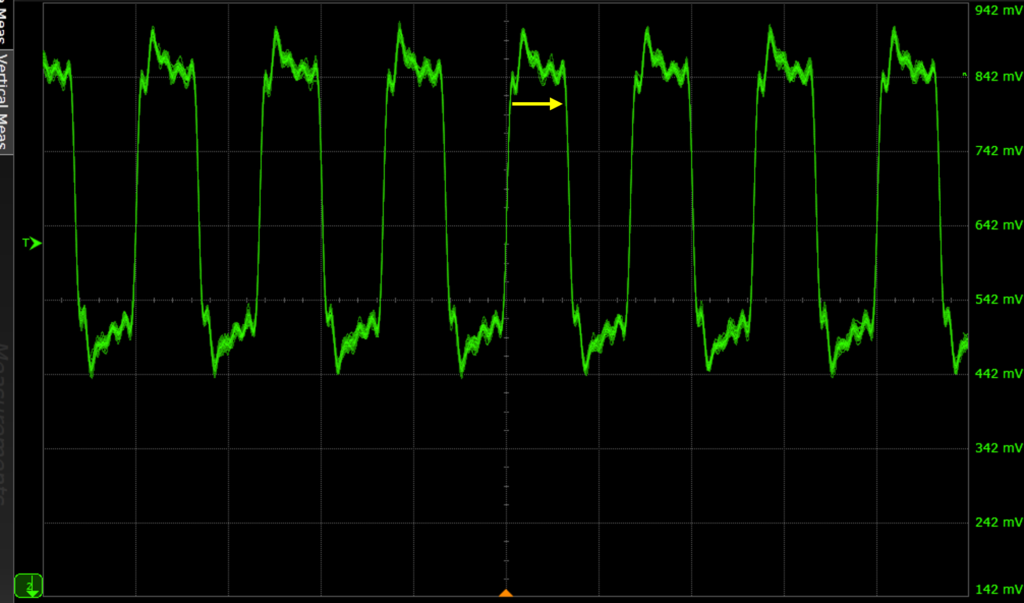
Figure 7: Final tuned values for RttWr and RttPark.
In this article, we introduced the 7412 DDR5 RDIMM Riser. We showed how the same riser can be used for both logic analysis and oscilloscope probing. And we showed a real case study of how the riser was used to debug a memory controller targeting DDR5.
Do you need to probe DDR and LPDDR signals? Please reach out to us at info@introspect.ca for more information and to discover how powerful our probing capability is.